Tuesday, November 27, 2012

Hair Accessory Display

I love this craft because it's 1.) CHEAP!! and 2.) you can incorporate help from your little girl. These are great gifts too!
 
I found these cute pre-painted pieces at Wal-Mart for $0.59. You can use any wooden piece.  If you use one that needs to be painted, you can buy an extra one for your daughter to paint while you do yours.
 
I started with this cute flower {I bought a cupcake wood piece that I made for my niece}


Next, I cut a piece of ribbon at the desired length and glue gunned it to the back of the wood piece. I prefer a long ribbon {I have 3 daughters which means I have gazillion bows}.  With shorter width ribbon, cut off about 3 inches. Form a loop with the ribbon and glue at the top. This will be used to hang on a hook.


Hang your bow holder. I prefer a hook that you can easily remove and there is no hole in the wall.

I hide mine inside the bathroom linen closet. It frees up space in the drawers, keeps the flowers looking pretty and easily accessible.


Thursday, November 22, 2012

Orange Rolls

Happy Thanksgiving!! Don't we live in the most beautiful country?! I feel so blessed! I have a great husband that loves me and puts up with my randomness. I have 5 children and although 4 are living, they are healthy and happy. My baby was a blessing and taught me so much! I am grateful for the gospel and promises of an eternal family!
 
I live thousands of miles away from my family... all family. They live in Washington, Idaho, Utah, Colorado, and Arizona. I'm in Virginia. Yeup, that's far. It's not easy to gather for holidays. Not to mention that it cost a shiney, pretty penny.... {lots of shiney pennies} 
 
For Thanksgiving we are having some friends over. Thank goodness they have kids because I enjoy a loud, crazy house!
 
Yesterday I was preparing my grandma's famous orange rolls. I've never made them before. I started making them and had to call my mom because I was really confused at the directions. My mom walks me though them and as she's talking, I realize that what she is saying is written in the recipe... that I didn't read all the way through. Haha!
 
So today I'm actually making them and I think "I really wish I had my grandma here to help me." She's living and well in Utah. I kick myself because I didn't hang out more in the kitchen when we gathered for holidays or in general. If I could pass on today's lesson it would be to "get in the kitchen, help and enjoy the girl time!" There is so much to be learned from our great grandma's, grandma's and mothers!! I'm including my grandma's orange roll recipe. It's too good not to share! And read the recipe thoroughly :o) {P.S. I didn't read the directions thoroughly [again] and didn't let my rolls rise the second time. So your rolls will look different then mine below.}
 
 
Orange Rolls
 
2 tablespoons dry yeast
1/2 cup warm water
1/2 cup sugar
1/2 cup butter
2 cups water
6 cups flour
2 eggs
 
 
Dissolve yeast in 1/2 cup warm water.
 
In a large bowl, mix sugar, butter and 2 cups of water. Melt these ingredients in the microwave on high for 2 minutes. Remove from microwave and let mixture cool to room temperature. Once cooled, add dissolved yeast and stir well. Add eggs one at a time and mix well. Next begin to add flour. Start with 4 cups and keeping adding 1/2 cup at a time. Mix well. Dough should be firm but a little sticky. 
 
Cover and let it rise. You can make this up to 3 days before you use it. If you are making these for another day, place in a covered bowl overnight in the refrigerator. Take out of refrigerator 1/2 hour before you want to make the rolls. 
 
Preheat oven to 375 degrees. Divide dough in half and roll into a rectangle. Dough should be thin. Spread orange filling (below) all over. Roll up rectangle long ways and cut about 1.5 inch rolls. Place in greased muffin tin. Let rise until double in size. Bake 12-15 minutes. 
 
Orange filling
1/2 cup butter
1 cup sugar
grated orange rind
 
Put ingredients in a bowl and melt in microwave until butter is melted.
 
 
I miss family. I pour myself a pepsi in a wine glass. A girl needs a pretty glass to sip from!
 
Enjoy the rolls, your family and friends!
 
Happy Thanksgiving from us girls!


Monday, November 19, 2012

Candy Dish


I love Pinterest! {Who doesn't?!} I had seen a pin with a plate glued to a candlestick holder {from Natalme}. Cute huh?!


So while I was at the thrift store, I came across these beauties! The larger one was $1 and the small one for $0.75. SOLD!!


I glued them together using Gorilla glue. Here are a couple ways to use them...


This is my favorite...


Friday, November 16, 2012

Wax this - Upper Lip

Years ago while in high school, I was driving to school with my sister. She told me that mom took her to get her upper lip waxed. {I was jealous!} She shaved her legs first (in 2nd grade) and now this!! I'm the big sister, not her.
 
But my mom was taking care of my sister. No girl wants to be teased because of leg hair or facial hair.
 
We all have facial hair. Some more than others. Some darker than others. I have light facial hair. It irritates me that while wearing foundation and using powder it sticks to those little suckers. You can see it. I can see it and it makes me go crazy. Crazy! I feel like it's on display.
 
I've tried many types of home waxing products: the strips, microwaveable wax, and different brands. My favorite for the past 8 years is Parissa. It is sold at Ulta and Target for about $8.  
 
 
I love this wax. Parissa wax hardens, which has been my favorite to any other kind.
 
To use, read the enclosed directions. I'm not going to lie. It hurts like mad to pull it off. It's slightly better if you have someone else pull. The vial of oil is necessary. It helps get any residue left. I've also found that if I use the oil, I don't break out.
 
I have melasma (the dark spots above the upper lip, aka mask of pregnancy) and they haven't gone away. I have been using pigment lightening pads prescribed by an esthetician. About a month ago, I had a follow up. She asked if I waxed. I proudly told her yes. She said that waxing makes the spots worse and suggested threading.... which I can't do myself and don't plan on paying someone for. So for now I'm trying out the Olay hair removal cream. This costs about $27. A friend uses Sally Hansen hair removal cream that is more cost friendly - $6. I haven't tried it yet, but for the price, I'm willing to switch.


Sunday, November 11, 2012

Painting - Accent Wall

While my little girl was napping, I took on a project... painting a wall in my 6 year old daughters room. It took me an hour and a half to paint and clean up. So come on girls!... you can do this too!


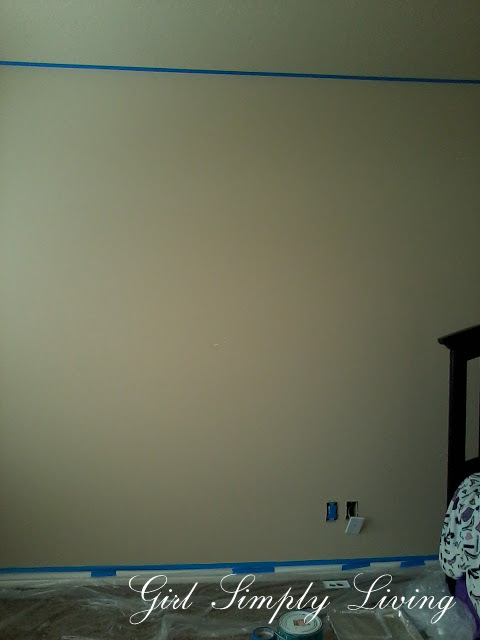
First, move all the furniture back from the wall. If there are any holes, fill them in. Remove any hardware. If there is any grease/oil marks, use a mild detergent, water and a cloth to wipe down the walls. With the painters tape, tape off the baseboard, ceiling and side walls. I taped in long pieces. It makes for easy removal. Painters tape is a must!! This will leave a straight line when your finished painting. Finally, cover the floor with the plastic drop cloth. Tape it to the baseboard to ensure that it doesn't move.


I started painting the edges with a medium sized brush. You can buy them at Home Depot or Lowes.  I also painted around the wall cut outs.


While painting, create a note for your husband, boyfriend, or child on the wall, take a picture of it & send it.  I sent this to my husband while he was at work. It reminds him that I'm thinking of him!


While painting, you don't want to only go up and down. To get better coverage, make Xs and then go up and down. This will help get in all the little grooves in the wall. To ensure even coverage and optimal color, use a second coat.


I added a this fabulous chandelier decal from Target {you can also find them at just about anywhere}.


See! Now wasn't that easy?!

Thursday, November 8, 2012

Refurbished Corner Hutch


I bought this at a thrift store for $10. The guy who helped put it into my car said "you want this old thing?" He was probably feeling sorry for me thinking I had bad taste. I told him, "I see a diamond in the rough."


I wanted to paint it black... that meant removing the paint. First, I removed the doors. I tried Strypeeze on 2 of the shelves, which took the whole can. There were 7{SEVEN!} layers of different paint.


As you can tell, the Strypeeze didn't go all the way down. I decided to use my Black&Decker Heat Gun. This is the best tool ever! The heat gun will bubble up the paint and then you scrap it off with a putty knife. It is so much quicker and easier when you have layers of paint... not to mention cheaper.
 

The heat gun took me pretty far down, but not all the way. I sanded all the way down to the bare wood.

I used Elmer's wood filler to fill in any cracks. To sand, I used the Black&Decker sander. I love this one because it has a velcro underneath. The sandpaper adheres to the sander. No hooking, cutting. {I found a big stack of sandpaper at the thrift store for $1}


I used Valspar Signature Color in Black with a Satin finish. I used a sponge roller which was easy and painted the corners with a sponge brush.

 
This is a decorative wood piece I bought at Lowes. I attached it with Elmers wood glue.
I distressed the corners, edges and decor piece.


I display my grandma's tea sets.


Wednesday, November 7, 2012

Homemade Macaroni & Cheese

My sister in law is an amazing cook. More than just amazing... she creates these gourmet meals that you only read about in magazines. Many years ago for my brother in laws birthday, she made macaroni & cheese... and it wasn't from the box. It was really good!

Years later I came across this recipe years later and it's become a family favorite. I love its simplicity. I got this recipe from a Williams-Sonoma kid cookbook. You'll have to forgive me... I wrote down only the ingredients, but not the directions. If you have questions, leave a comment. I'll get back to you.

I pair this cheesy dish with steamed broccoli. Cheese, broccoli... you can't go wrong!


2 tbsp Butter
2 tbsp Flour
1 2/3 c Milk
1 c shredded extra sharp chedder cheese
2 tbsp grated parmesan cheese
 
1 lb Dried pasta (I like the small shells)
 
 
Directions: Cook pasta according to box.
 
Melt butter in pan. Add flour and whisk together. Pour in milk, whisk continuously. Bring to a boil. Remove from heat and add cheeses while whisking sauce.
 
Pour cheese sauce over noodles.
{I like lots of sauce, so I usually double the recipe}


Teresa adds: This is my favorite Mac & Cheese, especially if Sarah makes it. Food always seems to taste better when someone else makes it ;)